3D printing allows the creation of 3-dimensional objects, just as an inkjet printer prints text and graphics.
The 3D print is created in a series of layers, stacked on top of each other. The most common implementation is called Fused Deposition Modelling (FDM) where an extruder head squirts molten material (mostly a type of molten plastic) in a similar manner to an inkjet. The
material will stick to the layer underneath as it cools
, gradually building up the object. Most of the relatively cheap 3D printers available use this method. A newer technology is SLA (Stereolithography) which works by solidifying an ultra-violet sensitive resin in a bath using a laser or ultra-violet LCD. The resolution of the SLA printers is much greater than FDM, but the consumables are expensive, and the process is messy as it is a wet process, and considerable post-processing is required. The price of the SLA printers is rapidly dropping and they are now priced at the level FDM printers were at only a couple of years ago.
I started toying with 3D printing, as an experiment to try making my own components, principally the 9ft diameter wheels required for modelling the early Bristol & Exeter Railway locomotives. When I started investigating this, prices were considerably higher than today, a typical kit costing between £300 and £400. I attempted to save money by buying the components separately, an approach I think was
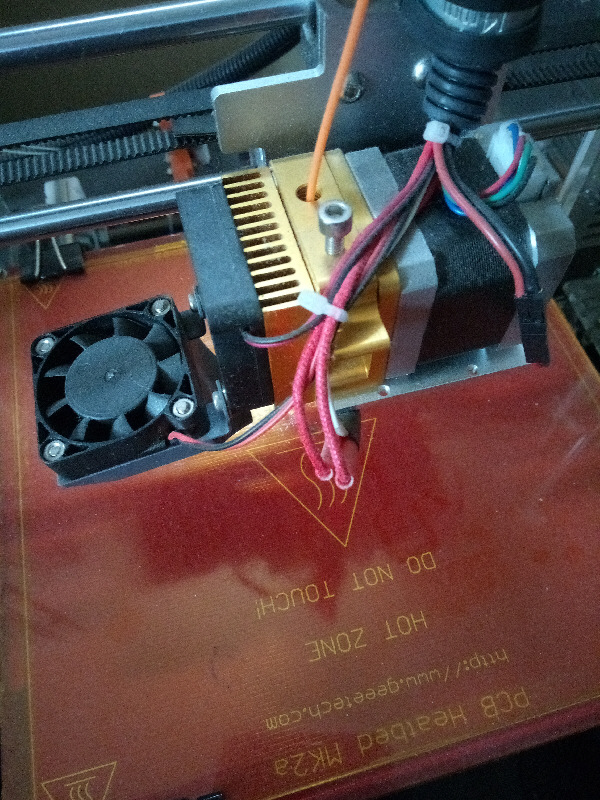
correct, but it considerably complicates the process. Here you can see my Prusa I3 printer as initially completed, before the wiring was tidied up.

The Prusa I3, designed by Josef Prusa is probably the most common variety of 3D printer available today. There are many variants available, and prices have dropped dramatically since I constructed mine. Prices start now from under £150.00 for a complete kit, shipped from the UK so no customs duty is payable. The very cheap printers seem to suffer a number of problems, principally with the extruders used, which have a tendency to jam. A higher quality Geeetech unit , shipping from London can be obtained for £185, and this companies products are highly recommended, despite what some American reviewers seem to think. Many of the printers though, are shipped from China, and so will arrive with a large customs duty/VAT bill. My printer was built at minimum cost, by selecting components from separate suppliers, as a learning experience, which it certainly has been. If I was starting again, I still think this would be the correct approach, but I would select better quality components. The trouble is that, at the start you have no idea of the quality of different firms components, or the benefits of the different components available.
The main requirement for a printer is that it is built square and as rigid as possible. I would definitely NOT recommend building or operating on a carpet as shown above. Apart from looking untidy and inviting accidental
damage from children/pets, carpets are not flat. Your printer needs to be on some kind of table, or board. I would recommend the IKEA Lack side table, which is an ideal size and only £5 each. Buy 2 and you can build them into a housing for your printer - the plexiglass for the sides will be by far the most expensive component.
The mechanical components (acrylic frame, rods and 3d printed parts) were supplied by Sintron, and are not robust enough. The frame in particular is only 5mm thick acrylic, as opposed to the 8mm acrylic used by some other manufacturers. This makes it fragile and with a tendency to flex, when you really want a very rigid frame. It arrived already broken, and had to be replaced by the manufacturer. The 3D printed components were badly printed and required considerable machining to be assembled at all. PLA is horrible stuff to work with, being very hard, making it difficult to file, and impossible to open out holes with a drill, but with a tendency to delaminate the layers if too much force is used. In particular the bearings were very difficult to fit into their housings. I found that a mini drill with a tiny drum sander was the best (only!) tool that worked to enlarge the holes to enable the bearings to fit. For the amount paid, the Sintron components were still good value, and enabled me to gain a considerable amount of experience.

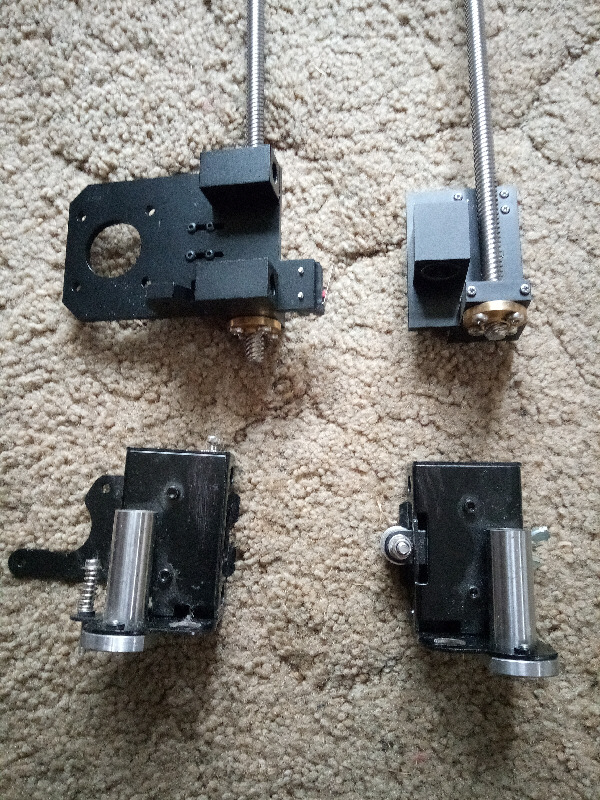
I found that I could not level the printing bed, as the Y axis carriage was so far from flat, that the spring adjusters ran out of adjustment. It might have been possible to adjust the bearing housings to get the carriage flatter, but it still wobbled badly every time it moved because of the flexibility of the thin acrylic. I therefore replaced the acrylic Y carriage with an aluminium one from Australia, and the plastic bearing housings with SC8UU cast aluminium bearings . This resulted in a much more horizontal carriage, but the adjusters are very difficult to adjust, requiring a small spanner and screwdriver, which can be tricky getting access at all positions.
With the replacement Y carriage, it proved possible to level the bed, and to try printing a few test pieces. I had great difficulty in getting the prints to stick to the build plate (Kapton tape coated glass). Possibly the build plate is not quite level, as the prints had a tendency to separate from the build plate at one corner before coming totally unstuck. Using cheap women's hairspray to coat the build plate seemed to partially solve the problem, in that about 30% of the prints
would succeed, the rest coming unstuck part way through the print. I managed to successfully print several test cubes, and a few of the 9ft
wheels, when the extruder mounting cracked right through

A new X carriage/extruder mounting in aluminium was ordered from China to replace the broken plastic component, and has been fitted. Also a fan kit from issue 91 of the Eaglemoss printer has been adapted to cool the printed filament. In an attempt to make adjustments easier, new levelling components were ordered that use thumbscrews, which should make bed levelling easier. Metal X ends from Geeetech were purchased to try to get away from using printed components, but these use a non standard spacing between the lead screws and the Z axis smooth rods, and cannot be fitted to my frame. A further set of metal X ends was purchased, which this time should fit, but time has so far prevented them being fitted and used.
The electronics components have been far more successful, comprising the standard NEMA17 motors driven from an Arduino microcontroller board with RAMPS 1.4 interface and 12864 display unit. The optical endstops originally supplied with these have been replaced by mechanical units, as I had difficulty coming up with a mounting system for them. The RAMPS 1.4 is equipped with thermal fuses to stop thermal runaway in the heated bed and extruder, and these caused a problem in that they can trip out too early due to overheating of the RAMPS board. The standard solution to this problem is to 3D print a fan mounting to mount over the RAMPS board to keep it cool. However I haven't been able to successfully print such a large object, so have had to run the bed heater on reduced power. This in turn prevents the use of ABS filament, as on reduced power, the heated bed is not capable of reaching the required temperatures.
| Original Components |
Supplier |
Ebay ID |
Origin |
| Frame & Rods |
Sintron |
3d_professional_shop |
UK / China |
| Printer controller (Arduino, Ramps, DRV8255, LCD 12864, optical endstops), MK8 extruder |
maxonix2014 |
UK |
|
| Stepper Motors |
think3dprint3d |
think3dprint3d_gmail |
UK |
| Glass printbed |
print0sphere |
UK |
|
| Bed heater, thermistors |
delhanway2009 |
China |
|
| 12V Power Supply |
torii_uk |
UK |
|
| Dupont connectors |
open_machines |
UK |
|
| Cork gaskets |
reprap_me |
Denmark |
|
| Fans |
sunny-planet168 |
China |
|
| Stainless screws, nuts etc |
boltbase |
UK |
|
| Nylon standoffs |
94racing-au |
Australia |
|
| Silicon wire |
componentshopuk |
UK |
|
| Replacement Components |
|||
| Mechanical endstops |
ecamcity |
China |
|
| SC8UU slide bearings |
heavends |
China |
|
| Aluminium Y carriage |
riffo |
Australia |
|
| Metal extruder carriage, Levelling knobs |
ynaan |
China |
|
| Metal X ends - beware non standard spacing |
Geeetech |
easybuy1413 |
China |
| Lead screws |
cskwin2015 |
China |
|
| Shaft couplers |
win2may |
China |
|
| Glass printbed |
chaoyuestore |
UK |
| Consumables |
Temperatures /Comments |
Make |
Ebay ID |
Origin |
| PLA filament (orange) |
200/195, 65/60 |
makersify |
UK |
|
| PLA filament (green) |
rose_home |
UK |
||
| PLA filament (black) |
200/195, 65/60, Poor quality - brittle |
byeco-ukstore |
UK |
|
| PLA filament (red) |
boaomanufactory |
UK |
||
| PLA filament (golden) |
bgareballing |
UK |
||
| ABS Filament (Black) |
bgareballing |
UK |
||
| PLA filament (dark grey) |
Will not adhere to bed |
sum2saday |
UK |
|
| PLA filament (green/yellow) |
Excelvan |
doogeegrow |
UK |
|
| PLA filament (black) |
CooCheer |
365digital |
UK |
|
| Kapton tape |
monsbasket |
China |
||
| Kapton tape |
ynaan |
China |
||
| Blue painters tape |
Non recommended supplier - fraudsters |
3M |
tobytrading |
UK |


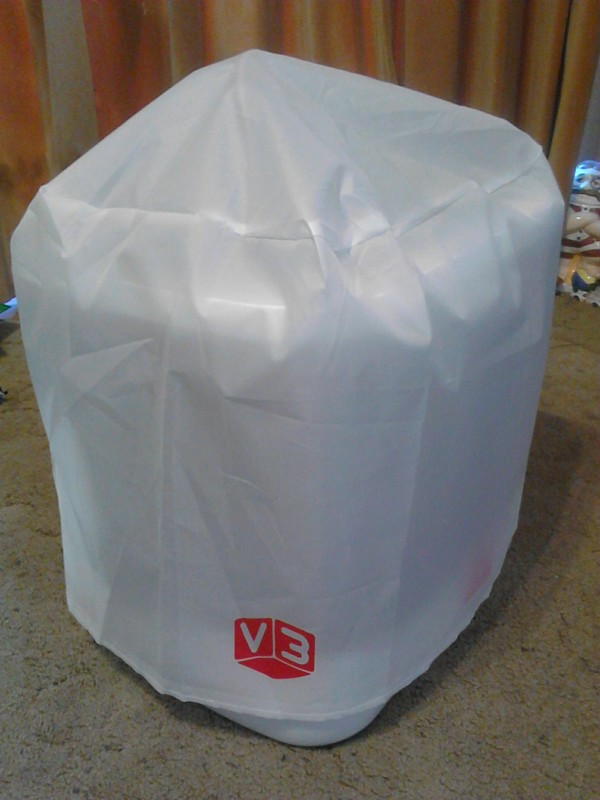
The Vector 3 printer was designed by Sebastian Conran and distributed as a self build partwork by Eaglemoss Collections. As with many of these partworks, the total cost is considerable (90 weeks at £6.99 = £629.10), but as the purchase is spread over nearly 2 years the pain isn't too bad.
The initial prospectus was very encouraging, seeming a considerable improvement over the Prusa I3 (other than the smaller build area). The printer was to have a 0.2mm resolution extrusion nozzle, and have an enclosed build area making the printer look tidier and reducing problems from draughts cooling the printer bed. On this basis I commenced a subscription, but unfortunately, partway through the build, the specifications of the printer changed. Principally the originally quoted 0.2mm resolution, which is considerably better than most printers commonly available has now been changed to 0.4mm, which is comparable with most common printers. The provided software, which was originally advertised as capable of running under Windows XP, now will only run under Windows 7 and above.
There have been a number of problems with the supplied parts, and magazines seemingly caused by poor quality control. Although the publishers seem happy to provide replacement issues, the replacements seem to suffer the same or worse problems.
Issue 14 - Right bottom plate - One of the fixing holes in this steel plate was not machined, and had to be marked and drilled. Due to thickness of the steel this wasn't quick or simple.
Issue 36 - Build plate heater - The heaters originally supplied proved to have a short lifespan, and had to be replaced by the publisher in issue 70. Due to the amount of disassembly required, I don't plan on replacing this
until it actually fails.
Issue 47 - Hood limit switch - The screws supplied don't fit the nuts - they have been badly machined, replacements were even worse. Replaced with new screws bought off ebay.
Issue 91 - Print cooling fan & duct - The instructions for this were incorrect, requiring them to add instructions to take the wiring apart and re-do in issue 98. The parts supplied also do not fit together properly, requiring
substantial remedial work with a file in order to avoid a great gap down the side allowing the air to escape, which defeats the object of having this at all.
Issue 99 - Netfabb Basic - By the time they published the magazine this program was no longer available, so the step by step instructions on how to download and use
it are rather pointless. It has been replaced by a limited time trial of the full version of Netfabb. Netfabb Basic can still be found on the internet, but not at the address shown in the magazine.
Issue 101 - MatterControl -
Again, by the time the magazine was published MatterControl Version 1.5.3 had been replaced by Version 1.6 which is substantially different, rendering the step by step instructions obsolete.
Issue 103 - MatterControl setup. The extruder nozzle diameter is given as 1.75mm, where it should be 0.4mm. This is such a huge error that it would be impossible to print succesfully. There is also an error further up the page where they have circled the wrong item.
I have to use my wife's laptop to run the supplied software (a customised version of Repetier Host), as it's the only machine available that runs Windows 7. Having completed the bed levelling, I attempted to print one of my 9ft wheels, with the following result :
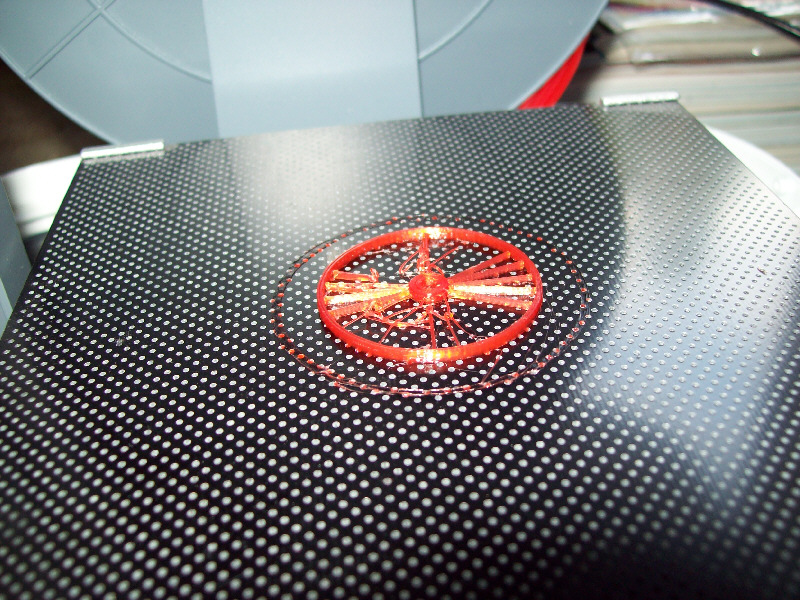
As you can see, although the wheel rim has printed correctly, the spokes have not. Some of them seemed to be deleted during the slicing operation, and most of the others seemed to be sliced incorrectly. It's possible that the thinness of the spokes is a problem for the supplied software, and printing directly onto the bed was perhaps not a good idea, as the wheel was stuck so securely that it was further damaged during removal. I'll have to try slicing directly with slic3r, rather than the supplied package, and covering the bed with masking tape to make removal of the print easier.
A number of problems have been uncovered during my limited use of this printer, and a quick search on the internet reveals these to be far from isolated incidents.
1. Grub screws loosening on motor pulleys. This seems to be a common problem - the gears are held onto the motor shafts with a single grub screw, and the vibration caused in operation causes them to loosen and fall out. This results in one (or more) axes failing to move. The cure is to use thread lock on the grub screws, but the enclosed nature of the Vector 3 makes the strip down and re-assembly to do this rather long winded.
2. Hood switch failure. A safety feature of the printer prevents operation with the printer hood in the raised position. The microswitch used to check the hood is lowered is not reliable (or the mounting for it is marginal) and vibration causes the switch to open in mid print stalling the printer. In extreme cases the switch moves so far that the software thinks the hood is raised constantly and refuses even to start. The simple solution for this seems to be to disconnect the switch completely. Currently I open the hood and press the switch with the aid of a lolly stick in order to get the printer to start.
3. Poor build plate. The perforated board gives a very poor finish to the bottom of prints, they are covered with protrusions where the filament has extruded through the holes, and this makes the prints difficult to remove. Covering the plate with blue painters tape gives a better finish, although Kapton tape may be preferable. Joins in the tape leave far too noticeable marks on the print, but very wide tape is both expensive and difficult to apply without wrinkles. Other people have replaced the build plate with one cut from aluminium. The odd shape of the plate to match the clips prevents a simple borosilicate glass build plate solution.
4. Poor Software. The supplied software is very limited and seems to give rather poor results. Fortunately there is an alternative. MatterControl is a free program that allows many different varieties of printer to be controlled. Unfortunately it doesn't have a preset configuration for the Vector 3, so you have to figure it out for yourself. Supposedly this is covered in the magazine, but there is at least one misprint which will prevent the supplied settings from working.
5. Poor design. The use of a single screw thread on one side of the printer has caused many people
considerable grief as the build plate can have a tendency to sag on the unsupported side. The crowning error however was the inclusion of an SD card reader on the motherboard, which can only be accessed by dismantling the printer. There is a facility to download files to the card and then print them, but it is slower than printing direct, and there is no facility for directly printing files stored on the card.
This is the printer that is set to make SLA printing readily accessible, with a reasonably large build volume, and a very reasonable price. Previous SLA printers having a very small volume, or a ridiculously large price. The UV sensitive resin is rather expensive, and cleanup after printing is messy, requiring large quantities of
Isopropyl alcohol. An updated version, the Photon S has recently become available, having an improved dual Z axis rail and a better front control panel LCD; but it is not software compatible, has no levelling screws, is more flimsy having a plastic body rather than metal, and has recently increased in price by nearly 50%, making it half as expensive again as the older model.


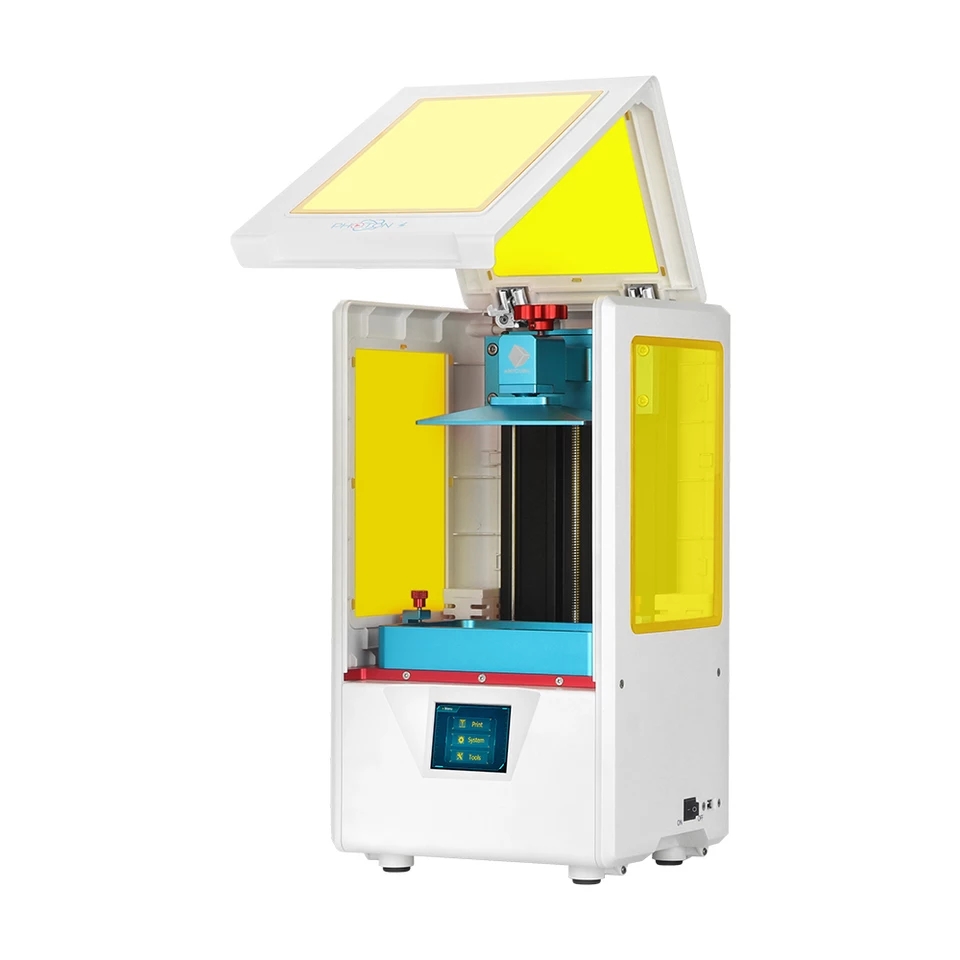
I was offered one of the newer models by the manufacturer at such a bargain price that I couldn't refuse, and so have recently taken delivery of a Photon S. It can be a bit tempramental, but it is worlds away from the pain that something like a Prusa can cause. The software that came with it is not useable on any machine I have - it fails to install correctly, and I can't get it to slice properly. I have had much more success with Chitubox, which at least slices properly, although it has trouble with manual supports (a known problem that is being addressed).
Some 3D models I have designed. Licensed for personal use only :
Tyre outside radius 4' 6" Interpolation 25
Tyre thickness 2.6", inside radius 4' 3.4"
Tyre width 6"
Hub radius 9.5"
Hub width 6"
Axle hole radius 4.762" (1/8" * 76.2 / 2)
Spokes 2" wide 5" deep, chamfered 0.5" and 0.2"
array of 26 at angle increments of 13.846degrees
updated : 14 Oct 2019